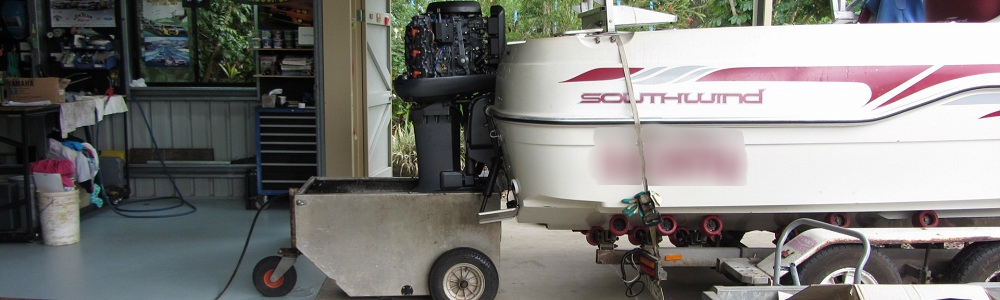
Flush Drum
Good Points - Effective method of flushing outboard
Washes the exhaust cavity of the gearcase.
Not as noisy
Bad Points - Takes time to fill drum.
Incorrect drum size has caused water pump failures
Procedure:
A good way of flushing your outboard is with a drum, tank or bag.
This will thoroughly flush out the gearcase exhaust cavity as well as all of the water galleries.
A common mistake is the drum being made too short. The water pump is located at the top of the
gearcase, where it joins onto the outboard. But, the water intake screens are often 150mm below
this. The water pump is not designed to lift a head of water. The tank must allow the water level to
cover the water pump.
A blue 205 litre chemical drum cut to size is a very good choice as it allows a level
of flexibility and the plastic is less likely to scratch your outboard.
Start the engine and check that the tell-tale is operating. If the tell-tale is not working,
turn off the engine and rectify the tell-tale problem. A piece of wire up the tell-tale
nipple may clear the blockage or, if you have access to compressed air, a blast of air normally
clears a blockage.
Run it at idle for a short while to allow it to warm up. The outboard should not be run at
high revs while in neutral. Do not put the outboard in gear or the propeller may damage the
tank or vice versa and the water will be thrown out of the tank.
Bring the neutral revs up a bit to allow extra heat and water flow to be generated.
This will cause the thermostat to open more and be better flushed.
Stay with the outboard while it is running in the tank.
After around 10 minutes of flushing, turn the engine off first and then drain the water from the tank.
Now apply the MACS or Salt-Away - Post Flushing Treatment as per the manufacturers’
instructions.
- Contact Cairns Outboard Service for your outboard service requirements.